When it comes to
maintaining your home appliances, the dryer often takes a backseat. However,
neglecting your dryer's vent screen can lead to serious consequences, including
fire hazards and reduced efficiency. In this detailed guide, we'll delve into
everything you need to know about dryer vent screen replacement, from its
importance to step-by-step instructions and FAQs.
Understanding Dryer
Vent Screen Replacement
Why Dryer Vent
Screen Replacement Matters
Regular maintenance of
your dryer's vent screen is essential for optimal performance and safety. Over
time, lint and debris accumulate, obstructing airflow and increasing the risk
of overheating. By replacing the vent screen, you ensure proper ventilation,
reducing the likelihood of fires and prolonging the lifespan of your dryer.
Signs It's Time for
Replacement
Identifying when to
replace your dryer vent screen is crucial. Look out for signs such as decreased
drying efficiency, longer drying times, excess lint around the dryer, or a
burning smell during operation. If you notice any of these indicators, it's time
to replace the vent screen.
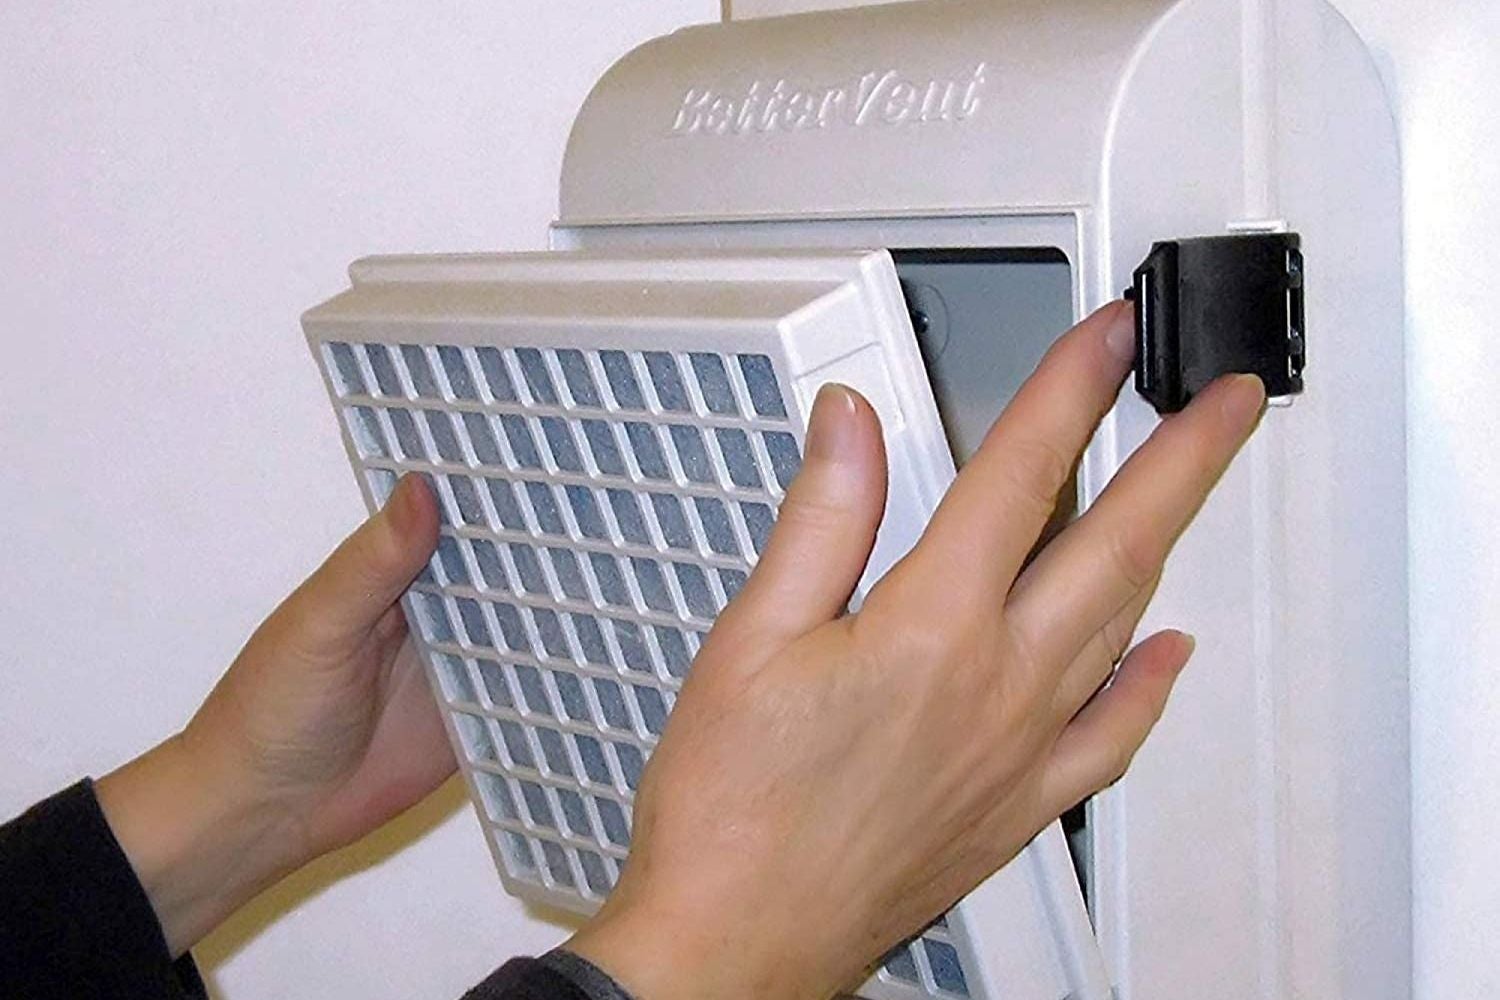
DIY Dryer Vent
Screen Replacement
Replacing your dryer
vent screen is a relatively simple task that can be done DIY-style with the
right tools and precautions. Here's a step-by-step guide to help you through
the process:
Step 1: Gather Your
Supplies
Before you begin,
gather the necessary supplies: a new vent screen, a screwdriver, duct tape, and
a vacuum cleaner.
Step 2: Disconnect
the Dryer
Start by unplugging
the dryer from the power source and turning off the gas supply, if applicable.
Move the dryer away from the wall to access the vent exhaust.
Step 3: Remove the
Old Vent Screen
Using a screwdriver,
carefully remove the screws securing the old vent screen in place. Once
removed, clean the area thoroughly with a vacuum to remove any debris.
Step 4: Install the
New Vent Screen
Position the new vent
screen over the vent opening and secure it in place with screws. Ensure a snug
fit to prevent leaks.
Step 5: Test for
Proper Ventilation
After installation,
reconnect the dryer and turn it on to test for proper ventilation. Check for
any signs of obstruction or leakage.
Step 6: Final
Checks
Once satisfied with
the installation, perform a final inspection to ensure all connections are
secure and the vent screen is properly installed.
When to Seek
Professional Help
While DIY replacement
is feasible for many homeowners, certain situations may warrant professional
assistance. If you encounter challenges during the replacement process or
suspect underlying issues with your dryer, it's best to consult a qualified
technician.
FAQs (Frequently
Asked Questions)
How often should I
replace my dryer vent screen?
Ideally, you should
replace your dryer vent screen annually to ensure optimal performance and
safety. However, if you notice any signs of damage or obstruction, such as
excessive lint buildup, it's advisable to replace it sooner.
Can I clean the
vent screen instead of replacing it?
While cleaning the
vent screen can help maintain airflow, it's not a substitute for replacement.
Over time, the screen may become damaged or degraded, compromising its
effectiveness. Therefore, periodic replacement is necessary to ensure proper
ventilation.
Is dryer vent
screen replacement a DIY task?
Yes, replacing the
dryer vent screen can typically be done as a DIY project. However, it's
essential to follow safety precautions and manufacturer guidelines to avoid
accidents or damage to the appliance.
What are the risks
of neglecting dryer vent screen replacement?
Neglecting dryer vent
screen replacement can pose various risks, including fire hazards, reduced
efficiency, and increased energy consumption. Additionally, blocked vents can
lead to moisture buildup, fostering mold growth and structural damage.
How can I prevent
lint buildup in my dryer vent?
To prevent lint
buildup in your dryer vent, ensure regular cleaning and maintenance. Use a lint
brush or vacuum attachment to remove lint from the vent screen and ducts
periodically. Additionally, avoid overloading the dryer and clean the lint trap
after each use.
What should I do if
I encounter challenges during the replacement process?
If you encounter
challenges or are unsure about any aspect of the replacement process, it's best
to seek professional assistance. Qualified technicians have the expertise and
tools to address any issues safely and effectively.
Conclusion
Dryer vent screen
replacement is a crucial aspect of appliance maintenance that should not be
overlooked. By following the guidelines outlined in this comprehensive guide,
you can ensure optimal performance, safety, and efficiency for your dryer.
Whether you opt for a DIY approach or seek professional assistance,
prioritizing vent screen replacement will ultimately prolong the lifespan of
your appliance and safeguard your home against potential hazards.
Comments (10)
Bit Appliance Repair's technicians are skilled and courteous. I'm grateful for their quick washer dryer repair service.
Bit Appliance Repair deserves all the praise for their same-day washer dryer repair service. They're simply the best!
Their washer dryer repair service exceeded all my expectations. Their technicians were professional, courteous, and knowledgeable, and they went above and beyond to ensure that my appliances were working perfectly. I'm incredibly impressed with their level of expertise and would definitely use their services again in the future.
Their washer dryer repair service exceeded all my expectations. Their technicians were professional, courteous, and knowledgeable, and they went above and beyond to ensure that my appliances were working perfectly. I'm incredibly impressed with their level of expertise and would definitely use their services again in the future.
Bit Appliance Repair's same-day service saved me from a laundry nightmare. Thank you for your swift repair!
Their washer dryer repair service is hands down the best in town. Not only were their technicians prompt and professional, but they also went above and beyond to ensure that my appliances were working perfectly. I'm incredibly impressed with the quality of their work and would highly recommend them to anyone in need of appliance repair.
I can't thank them enough for their prompt and professional washer dryer repair service. Their technicians arrived on time, assessed the problem quickly, and had my washer dryer up and running in no time. Their attention to detail and dedication to customer satisfaction truly set them apart. Highly recommended!
I had a fantastic experience with their washer dryer repair service. From start to finish, their team was courteous, communicative, and skilled. They arrived on time, diagnosed the problem accurately, and completed the repair in a timely manner. I couldn't be happier with the results and would highly recommend them to anyone in need of appliance repair.
Their washer dryer repair service exceeded all my expectations. Their technicians were professional, courteous, and knowledgeable, and they went above and beyond to ensure that my appliances were working perfectly. I'm incredibly impressed with their level of expertise and would definitely use their services again in the future.
I can't thank Bit Appliance Repair enough for their quick and efficient washer dryer repair. They're absolute lifesavers!