Is your once trusty dryer suddenly refusing to budge? The culprit might be a malfunctioning door latch, throwing your laundry routine into disarray. But fear not, fellow clothes-drying friend! Fixing a dryer door latch is often a surprisingly simple DIY project, saving you both time and money.
Diagnosing the Door Dilemma:
Before diving into repairs, a quick diagnosis is crucial. Here are some telltale signs of a faulty latch:
- The door won't close or stay shut: This is the most obvious symptom, preventing your dryer from starting its cycle.
- The dryer cycle stops mid-cycle: If the latch pops open during operation, safety switches might trigger a shutdown.
- Unusual noises: Rattling or clunking sounds during drying could indicate a loose or damaged latch.
Gearing Up for the Fix:
Once you've confirmed the culprit, it's time to gather your tools:
- Screwdrivers (flathead and Phillips)
- Needle-nose pliers
- Replacement latch kit (specific to your dryer model)
- Flashlight
Remember: Always unplug your dryer before starting any repairs!
The Repair Rodeo:
The specific steps will vary depending on your dryer model. However, the general process follows these lines:
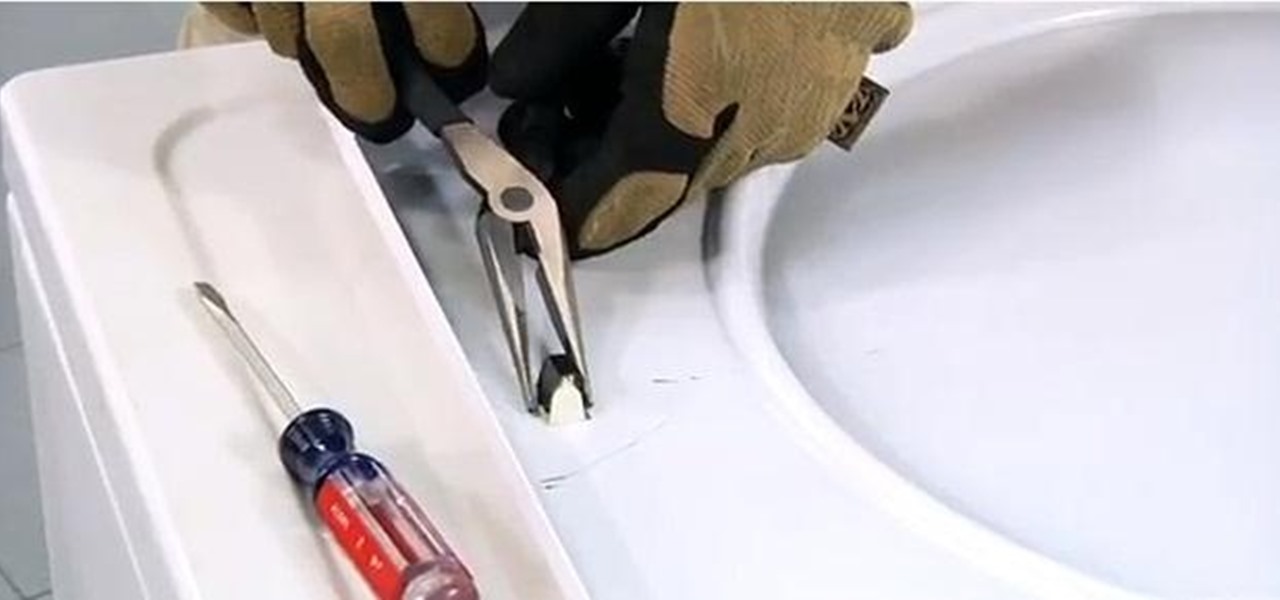
- Locate the latch: Consult your dryer's manual or online resources to find the latch's position. It's usually on the inner frame of the door or the dryer itself.
- Remove the old latch: Depending on the design, you might need to unscrew it, pry it out with pliers, or remove a spring clip.
- Install the new latch: Match the new latch to the old one and carefully position it in place. Secure it with screws or by snapping it into the designated slots.
- Test and close the case: Close the door firmly and ensure it latches securely. Run a short test cycle to confirm everything functions properly.
Bonus Tips for a Smoother Repair:
- Take pictures: Snapping photos during disassembly can be a lifesaver when putting everything back together.
- Label wires: If you need to disconnect any wires, clearly label them to avoid confusion during reassembly.
- Consult online resources: Many websites and YouTube videos offer model-specific repair guides and visual demonstrations.
The Final Spin:
By following these steps and utilizing the resources available, you can conquer that pesky dryer door latch and get your laundry routine back on track. Remember, if you're unsure about any part of the process, seeking professional help is always a safe bet. Now go forth, fix that latch, and let your clothes dry freely once more!
Comments (10)
I had a fantastic experience with their washer dryer repair service. From start to finish, their team was courteous, communicative, and skilled. They arrived on time, diagnosed the problem accurately, and completed the repair in a timely manner. I couldn't be happier with the results and would highly recommend them to anyone in need of appliance repair.
I was thoroughly impressed by the professionalism and expertise displayed by their team during my recent washer dryer repair service. From the moment I contacted them, their customer service was outstanding, and their technicians were incredibly knowledgeable and efficient. I'm extremely satisfied with the quality of their work and would gladly recommend them to others.
Bit Appliance Repair truly lives up to its name with their efficient washer dryer repair service!
Bit Appliance Repair's technicians are miracle workers! My washer dryer is working like new again thanks to them.
I can't thank Bit Appliance Repair enough for their quick and efficient washer dryer repair. They're absolute lifesavers!
I had a fantastic experience with their washer dryer repair service. From start to finish, their team was courteous, communicative, and skilled. They arrived on time, diagnosed the problem accurately, and completed the repair in a timely manner. I couldn't be happier with the results and would highly recommend them to anyone in need of appliance repair.
Bit Appliance Repair exceeded my expectations with their same-day washer dryer repair service.
Bit Appliance Repair goes above and beyond with their efficient washer dryer repair service. Couldn't ask for better!
Their washer dryer repair service is hands down the best in town. Not only were their technicians prompt and professional, but they also went above and beyond to ensure that my appliances were working perfectly. I'm incredibly impressed with the quality of their work and would highly recommend them to anyone in need of appliance repair.
I recently used their washer dryer repair service, and I couldn't be happier with the results. Their technicians were prompt, courteous, and incredibly skilled, and they had my appliances back up and running in no time. Their attention to detail and commitment to customer satisfaction are truly commendable. I highly recommend their services!